Why the Right Cable Gland is Crucial
When installing photovoltaic systems on pitched roofs, solar technicians and electricians face a central challenge: How do you route the PV cable safely and permanently through the roof covering into the building interior? Improper routing can lead to moisture damage, heat loss, and long-term problems with the roof structure.
In this guide, you will learn which methods have proven effective in practice and why specialized roof glands made of UV-resistant plastic are the most efficient solution for professional use.
The Challenge: Routing PV Cables Through Roof Tiles
Solar cables must be routed from the roof into the building interior – this applies to large PV systems as well as balcony power plants. The following requirements apply:
- Tightness: The gland must not impair the rain resistance of the roof covering
- UV Resistance: The material must withstand years of sun exposure
- Cable Protection: Sharp edges on roof tiles can damage the cable insulation
- Easy Installation: The faster the installation, the more economical the job
Method 1: Drilling Through the Roof Tile
Some installers drill a hole directly through the roof tile. We advise against this – the tile is weakened, cracks can form, and watertightness is not permanently guaranteed. Furthermore, the effort for drilling and sealing is disproportionately high.
Method 2: Routing the Cable Under the Roof Tile
A common practice is to route the cable under the edge of the tile. The problem: The tile no longer lies flat, gaps appear, and the cable is subjected to mechanical stress with every gust of wind. In the long run, this can damage the cable insulation.
Method 3: Using a Special PV Roof Gland (Recommended)
The most professional solution is a specially developed roof gland for PV cables. This is mounted in place of a roof tile or additionally under a tile and offers a defined cable duct with abrasion protection.
Advantages of a Dedicated PV Cable Gland
- Perfectly fitting integration into the roof covering
- No drilling, no cutting – tool-free assembly possible
- UV-resistant technical plastic for long service life
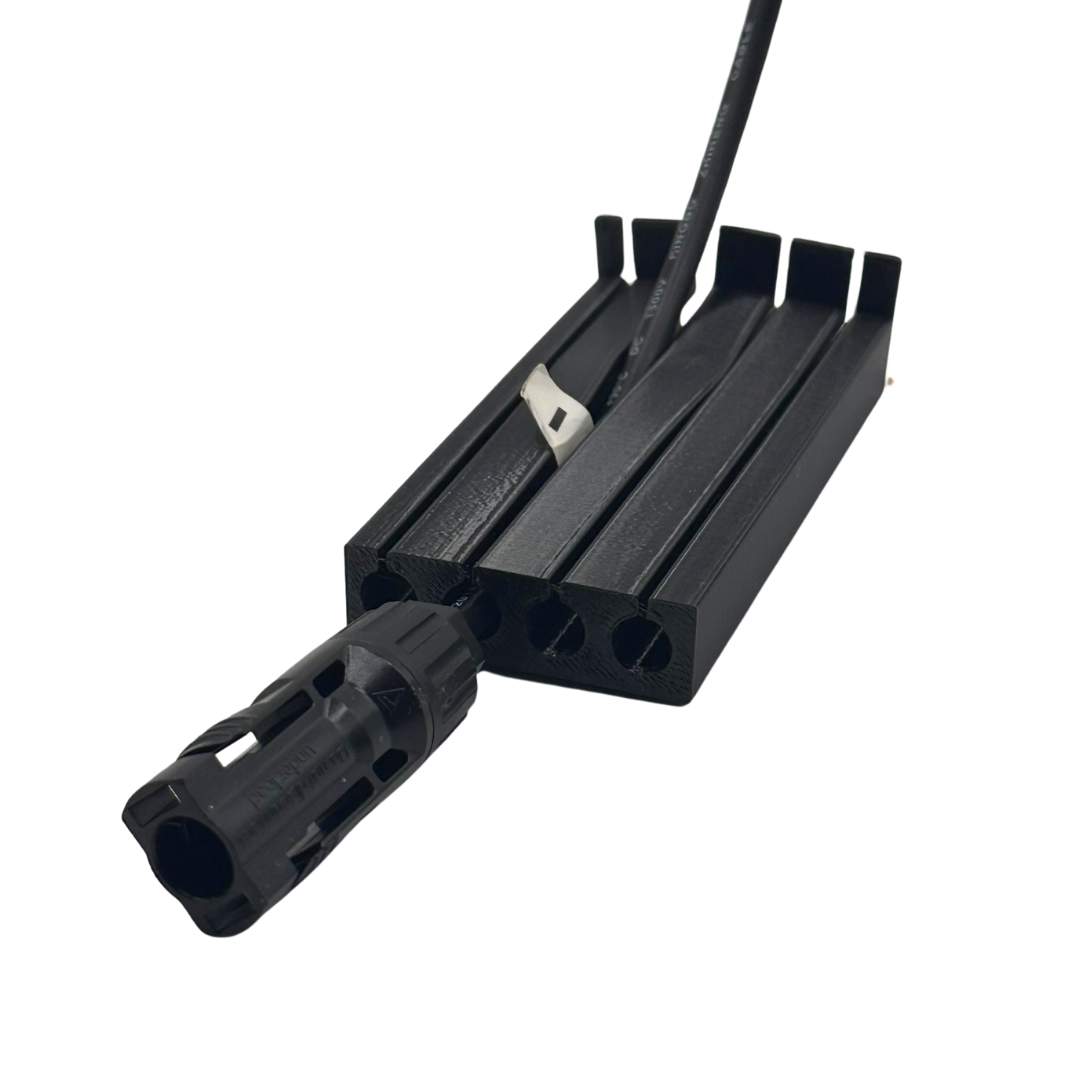
- MC4 connectors can be routed through without having to disassemble them
- Defined bending radius protects the cable insulation
Step-by-Step: Mounting a PV Roof Gland
- Determine Position: Choose the point where the cable is to be routed into the roof interior – ideally near the inverter location
- Lift Roof Tile: Carefully lift the relevant tile and the tile above it
- Insert Roof Gland: Place the gland on the battens and slide the tile back over it
- Route Cable: Guide the solar cable through the cable duct – with suitable models, even with an MC4 connector already assembled
- Visual Inspection: Check that the tile lies flat and no gaps are visible
What to Look for When Buying
Not every roof gland fits every roof. Please note the following points:
- Tile Type: Roman tile, beaver tail, or other roof tiles – the gland must match the tile shape
- Cable Diameter: Standard solar cables (4–6 mm²) up to earthing cables (16 mm²)
- Length of Gland: Depending on the roof structure, models with 105 mm, 125 mm, or 150 mm length are required
- Number of Cable Ducts: 2-way or 4-way glands for different requirements
- Material: UV-resistant technical plastic is ideal for permanent outdoor applications
B2B Volume Pricing for Solar Installers and Electricians
For commercial customers, we offer attractive volume prices. The larger the purchase quantity, the lower the unit price. Our PV roof glands are available in packs of 10 or more – ideal for businesses that regularly install PV systems.
All roof glands are manufactured in Germany and shipped directly from stock. We deliver quickly and reliably – even large orders.
Contact us for a customized offer: info@dachdurchfuehrung24.com or by phone at 07054 927999.
Frequently Asked Questions (FAQ)
Can I route MC4 connectors through the roof gland without disassembling them?
Yes, our roof glands are dimensioned so that MC4 connectors can be routed through without disassembly. This saves time during installation and avoids potential contact problems due to re-crimping.
For which roof tile types are the glands suitable?
Our roof glands are optimized for common pitched roof tile shapes, especially Roman tiles and comparable concrete roof tiles. Please note: The products are designed exclusively for pitched roofs with tile covering.
How many cables fit through one gland?
Depending on the model, you can route 2 or 4 cables simultaneously. For a typical balcony power plant installation, a 2-way gland is sufficient. For larger PV systems, we recommend the 4-way variant or multiple glands.
Do I need tools for assembly?
No, assembly is tool-free. The gland is simply pushed under the roof tile. No drilling, sawing, or gluing is required.